Setting up a Rucio Developer environment using IntelliJ Ultimate
This tutorial works on Linux, but it was confirmed, in the past, to not work on Windows. Windows support could have improved in later IntelliJ versions. If you manage to make it work, please tell us and update the documentation.
Prerequisites
-
An IntelliJ Ultimate licence is required. The
Freeversions doesn't have the needed features. Some people may qualify for a free licence. Refer to their website for more information. I assume it's easy to adapt the following tutorial forPyCharm Professional, but I don't have a licence to test it. -
If not already done, install the official
Pythonplugin by following their official documentation -
Your local user running IntelliJ must be able to run docker commands without the need for becoming
rootwith sudo/su. Running the following command and re-logining should be enough:sudo gpasswd -a $USER docker
Open the Rucio project in IntelliJ
Open the existing Rucio project in intellij. This should be trivial. However, if you need help with it, refer to the official documentation
Add docker-compose remote interpreters
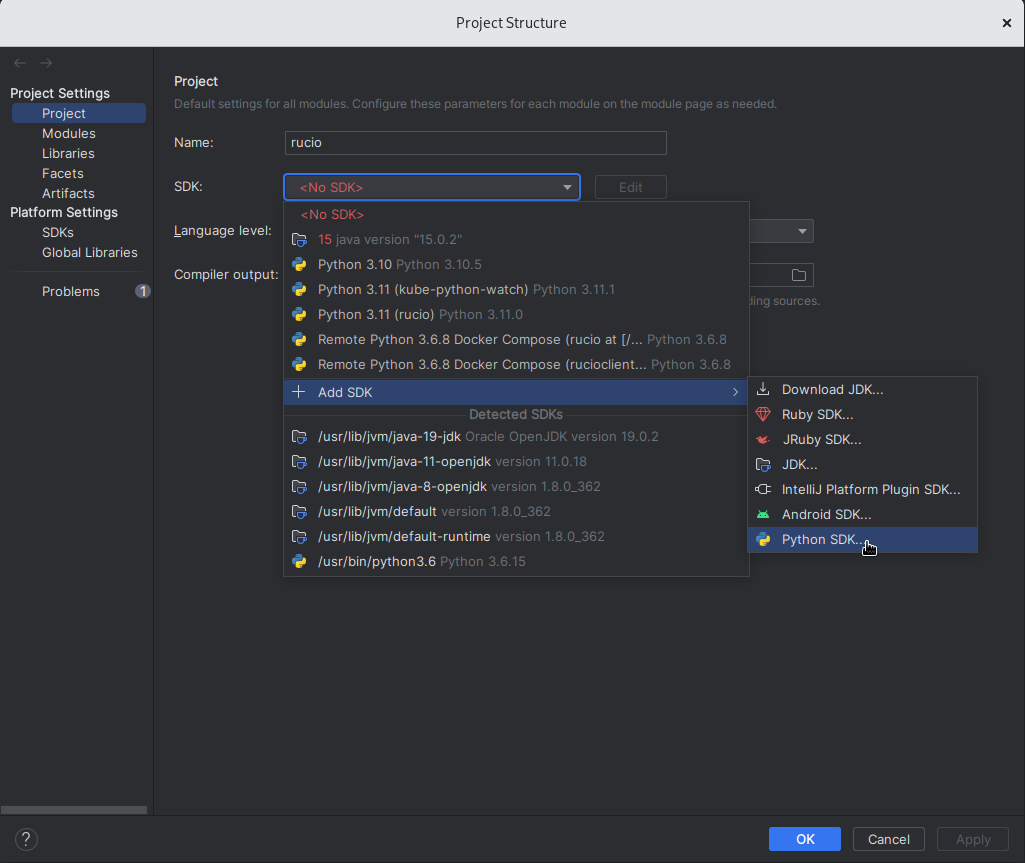
Once the rucio project opened in IntelliJ, navigate to
File/Project Structure and add a new python SDK as shown in the following
picture:
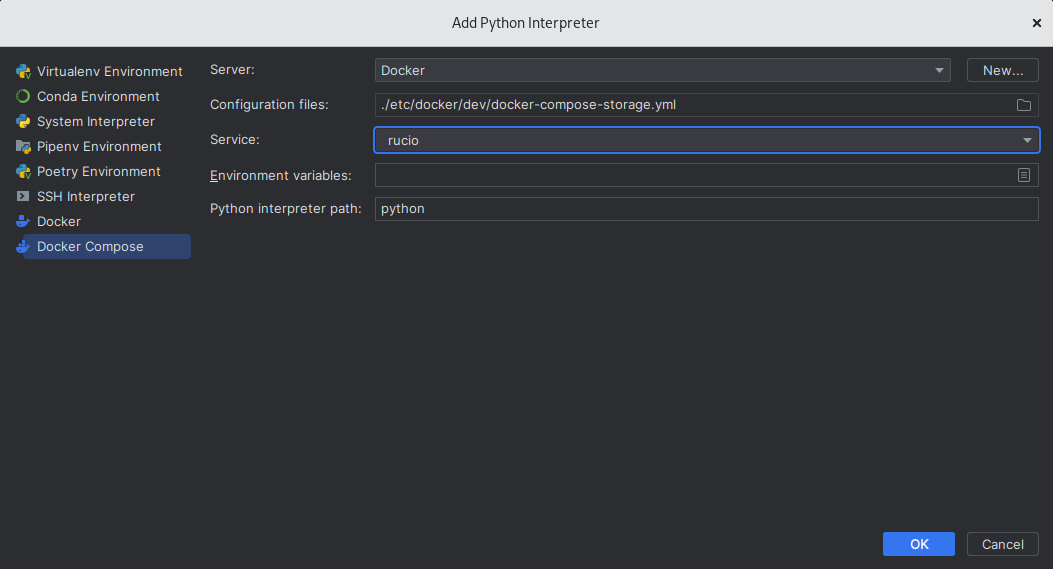
In the new window, as shown on the next picture:
- select
Docker Composein the left menu. - in the
Configuration Filesfield, navigate to the./etc/docker/dev/docker-compose.yamlwithin the project - in the
Servicefield selectrucio
Repeat the operation, but select rucioclient in the Service field.
Now you should have two remote interpreters configured. IntelliJ will start indexing the projects (see progress bar in the bottom right corner). Wait for indexing to finish.
It's important for the default interpreter to be the one with
Service = rucioclient. This should be the case if you added them in the order
mentioned previously.
Mark the bin and lib folders as Source folders
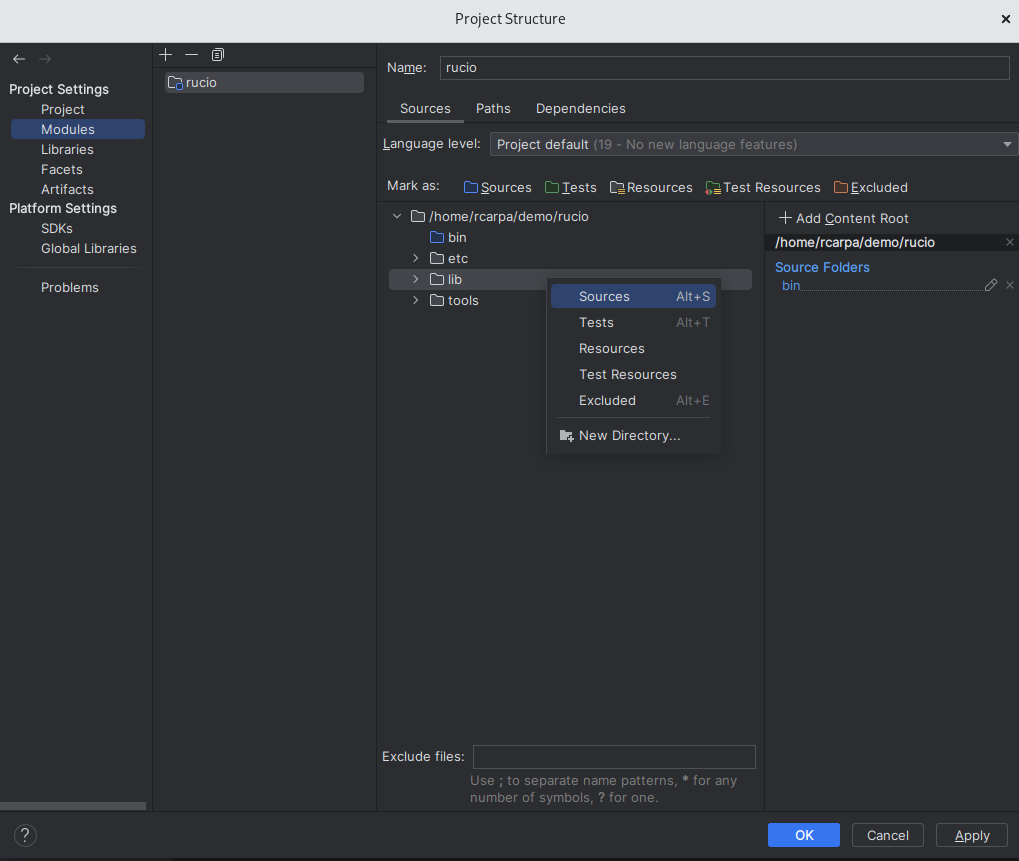
Open File/Project Structure again and navigate to Project Settings/Modules
in the left menu. Mark the bin and lib folders as Source folders. For
that, right click on them and select the folder type. As shown in the following
screenshot:
Start and initialize the docker-compose env
Follow our documentation to manually start the docker-compose environment and initialize the database and storage.
Debugging a daemon or core function
With the docker-compose env up in running, navigate to a test file. For example,
open the file lib/tests/test_config.py and refer to the following video for
an example how to debug a test:
Debugging the server
The procedure configured until now works very well for developing and testing daemons and core code. However, it doesn't allow to debug the server code. For that, one has to run the server separately.
Add a new Flask server run configuration in the menu Run/Edit Configurations
- Target type:
Module name - Target:
rucio.web.rest.flaskapi.v1.main - Additional options:
--cert=/etc/grid-security/hostcert.pem --key=/etc/grid-security/hostkey.pem --host=0.0.0.0 --port=443 - Environment variables:
LC_ALL=en_US.utf-8 - Use specified interpreter: select the
ruciodocker-compose remote interpreter.
This will allow to debug the code on server side.